ChatGPT部署到QQ机器人上
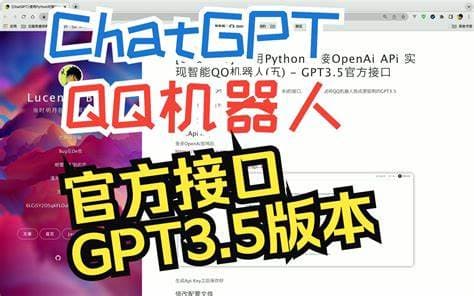
ChatGPT部署到QQ机器人上
沐飞openai的聊天机器人最近大火,上手试了试,和过去相比进步太多了
已失效
目前解决方案
Setup · acheong08/ChatGPT Wiki (github.com)
5分钟在QQ群搭建ChatGPT机器人! - Chris’s blog (chrisyy.top)
下面的操作可以在自己的虚拟机里弄,也可以在云服务器里弄
[ChatGPT] 使用Python对接OpenAi APi 实现智能QQ机器人(三) - 搭建QQ机器人 - Lucent’s Blog
跟进
Tag ““ does not correspond to any known ansi directive
更新到python3.9
# 我也使用的wget ,我下载到了home中
wget https://www.python.org/ftp/python/3.9.0/Python-3.9.0.tgz
# 在home中解压
tar -zxf Python-3.9.0.tgz
# 进入python3.9
cd Python-3.9.0
#安装依赖
sudo apt-get install libffi-dev
sudo apt-get install openssl

# 编译文件  时间大概有1-3分钟
./configure --prefix=/usr/local/python3

# 编译好后,会有另外一个提示,让run ./configure xxx
./configure --enable-optimizations

# 安装
make && make install

# 检查python3版本
python3 -V
配置cqhttp
放在一个文件夹里
screen -S gocq #打开新窗口chmod +x 文件名 #给下执行权限./软件名- 修改qq账号
- 修改
ws-reverse中universal为ws://127.0.0.1:8080/onebot/v11/ws最后servers部分的配置 - 然后再次运行./go-cqhttp,完成登录后按Ctrl+A+D放到后台运行
框架设置
安装
mkdir ~/.pip

vi ~/.pip/pip.conf

复制如下内容(阿里镜像源为例):
[global]
index-url = http://mirrors.aliyun.com/pypi/simple/
[install]
trusted-host = mirrors.aliyun.com
screen -S robot
python3 --version 查看版本
python3 -m venv venv
source venv/bin/activate
pip3 install nb-cli
pip3 install nonebot-adapter-onebot # 安装适配器
nb # 生成bot文件
按空格选择
测试
nb run #启动bot要与机器人互动,可以首先使用/echo命令让其输出一些信息,斜杠/是nonebot默认的命令起始符号,可以自定义设置。
安装插件
nb plugin install nonebot-plugin-chatgpt #安装插件修改配置
bot.py
#!/usr/bin/env python3
# -*- coding: utf-8 -*-

import nonebot
from nonebot.adapters.onebot.v11 import Adapter as ONEBOT_V11Adapter #这一句可能没有

# Custom your logger
#
# from nonebot.log import logger, default_format
# logger.add("error.log",
#            rotation="00:00",
#            diagnose=False,
#            level="ERROR",
#            format=default_format)

# You can pass some keyword args config to init function
nonebot.init()
app = nonebot.get_asgi()

driver = nonebot.get_driver()
driver.register_adapter(ONEBOT_V11Adapter) #这一句可能没有

nonebot.load_builtin_plugins("echo")

# Please DO NOT modify this file unless you know what you are doing!
# As an alternative, you should use command `nb` or modify `pyproject.toml` to load plugins
nonebot.load_from_toml("pyproject.toml")

# Modify some config / config depends on loaded configs
#
# config = driver.config
# do something...


if __name__ == "__main__":
    nonebot.logger.warning("Always use `nb run` to start the bot instead of manually running!")
    nonebot.run(app="__mp_main__:app")
pyproject.toml
[tool.poetry]
name = "bot"
version = "0.1.0"
description = "bot"
authors = []
readme = "README.md"

[tool.poetry.dependencies]
python = "^3.7.3"
nonebot2 = "^2.0.0-beta.1"

[tool.poetry.dev-dependencies]
nb-cli = "^0.6.0"

[tool.nonebot]
plugins = ["nonebot_plugin_chatgpt"]  #这里添加插件名字
plugin_dirs = ["bot/plugins"]

[build-system]
requires = ["poetry_core>=1.0.0"]
build-backend = "poetry.core.masonry.api"
.env.dev
HOST=127.0.0.1
PORT=8080
LOG_LEVEL=DEBUG
FASTAPI_RELOAD=true

command_start=[""]

CHATGPT_SESSION_TOKEN="xxx" # token信息
CHATGPT_COMMAND="。"		# 触发聊天的命令
CHATGPT_TO_ME="False"	# 是否需要@机器人

CHATGPT_CD_TIME="5"
token获取
打开https://chat.openai.com/chat

运行
screen -S qqrobot
source venv/bin/activate
nb run
完成后按Ctrl+A+D放到后台运行
screen -r qqrobot #打开qqrobot中断窗口相关资料
参考网站
5分钟在QQ群搭建ChatGPT机器人! - Chris’s blog (chrisyy.top)
运行框架
nonebot/awesome-nonebot: NoneBot 相关资源汇总 (github.com)
chrisyy2003/lingyin-bot (github.com)
插件
评论
匿名评论隐私政策
✅ 你无需删除空行,直接评论以获取最佳展示效果